
Setup
How to Set Up Your Schools
Welcome to the AquaOptimism family!
Please follow these steps to begin your learning journey.
Step 1
Prepare a CSV file with the users (teacher and students) for each class. Check that the following conditions are met:
- Students and teachers are indicated.
- First, last names, and emails are present.
- 1 CSV is equal to 1 class in a school (not the whole school or grade level).
Step 2
- On Your Users page, click on your Account Name.
- On the next page, scroll down and click on Enrolled Users.
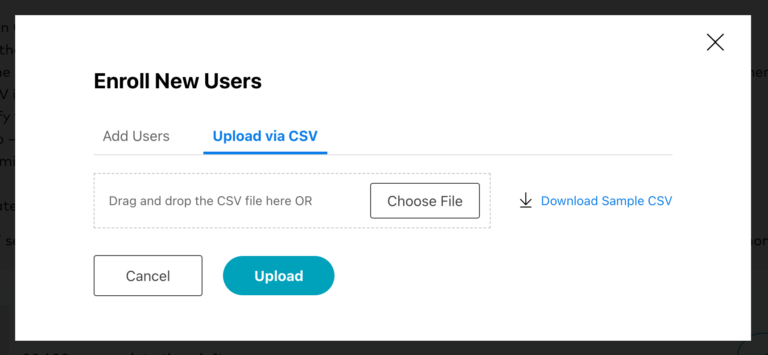
- Click on Enroll New User.
- Select Upload via CSV and Choose File. Only upload one class at a time.
Step 3
- Scroll down and click on Group then Create New Group.
- For clarity, name the group using the name of the school, grade and teacher (i.e. School 1_Grade 2_Smith).
- Input the number of seats. This is the number of students and teachers allocated to the group you are creating. Identify the teacher(s), then the students.
- In the Units field, add the course being assigned to this group.
- Click on Submit.

You have now created your first group! A few other helpful tips:
- Use the same process for each additional class you are enrolling.
- Click on Edit Account Details to customize the name and photo associated with each account.
- From the Report section you can see each student’s progress.
- Questions? Contact info@aquaoptimism.org